How to Create Keyboard Macros in Windows 10
Computers were invented to make our life easier, and save time, as well. Even though computers are still helping us to make our lives easier and save time, we count on computers for a lot more today. Kudos to the engineers and developers, who have made our computers, do a lot more than it used to, a few decades ago. However, sometimes it is the productivity and the smartness of the user, who can use the computer to save more time by using certain tricks. One of them is the use of macros. Macros can save a lot of time while doing or repeating the same set of tasks multiple times.
For example, you apply a set of filters in tandem, on multiple photos, or execute some steps in sequence to edit a set of videos. In that case, you can create a macro that can automatically execute the steps one after another, which would otherwise require a lot of time, if done manually. You can create multiple macros for each set of tasks, and with some smart macro tools, you can even automate almost all your everyday tasks. Even if you do not use macros for everything you do on your computer, letting macros do some small tasks can come in handy for you, to say the least. So, today, I will talk about, how you can create a macro, and before that, I will also talk about the points to keep in mind before creating macros, or before executing them.
Points to keep in mind while creating a macro
When it comes to creating a macro, you should keep some points in mind so that the instructions are executed properly.
In the case of macros that I will discuss here, you can record the macros for later execution by executing the steps one by one, just once. For example, as I hinted in the introduction if you execute steps in tandem to apply certain filters on a photo to edit the same, you will have to do that on the first photo or set of photos to record the steps, and after it is recorded, you can stop recording the macro and save it, so that you can execute it again at a later time.
What happens at the time of recording a macro is simple. The macro recorder records your mouse movements; the mouse clicks, both left, and right; keystrokes; including the waiting time between two tasks, and similar such inputs. Now, while executing the macro, those steps will be executed exactly the way it was recorded.
Now, let's find out the points to keep in mind before, or at the time of recording macros. I will also talk about some good practices while recording macros.
- First things first, as a macro will record everything from mouse movements to keystrokes, make sure, you are recording the macro in a proper window state. Let me make things a bit clear for you. If at the time of recording a macro, you click on some part of the screen for any reason, those clicks will be recorded and performed, which can delay the execution, or can carry out other activities, which can ruin the execution of the next steps. So, try keeping the screen free from unnecessary windows, menus, and everything else. Lastly, try to maintain the same state of the screen while executing the macro, as well.
- At the time of executing a macro, it is a cool idea to use the shortcut keys as much as possible and avoid using the mouse. As at the time of recording a macro, the co-ordinates of the areas being clicked, are recorded, it can sometimes, lead to troubles, as I talked about, in the last point. Shortcut keys make macros more accurate, and I will recommend you to use them if there is an option for the same. However, if there is no option for shortcut keys, you can keep using the mouse clicks. Just use the 'Alt' key to find out the most common shortcut keys for various buttons or menus in most applications.
- I already discussed the importance of shortcuts keys in macros. However, if the opening of a program is recorded within the macro, better use certain hotkeys to open the programs that you need. You can write an AutoHotKey script to bind a shortcut key with an application, and use that shortcut key while recording the macro. There are even certain macro recording utilities, which can come with some in-built tools to write hotkey scripts. Using the navigation keys or the mouse to open an application isn't recommended while recording a macro.
- Rehearse properly before creating a macro. If you keep searching for the tools at the time of recording a macro within an application, the macro will standstill in the respective intervals at the time of execution, as well. So, just execute the steps a certain number of times to make yourself used to the interface before you finally come on the launchpad to start creating the macro.
So, those are the points that you should keep in mind. Let's now find out, how you can create macros on a Windows computer.
Creating a macro on Windows 10/7
Step 1: To record macros, you first need a software that is capable of doing so. There are several programs available for Windows that will help you record macros, but I use MacroRecorder, which is a freemium software that can cater to the need of most users. You can download it here.
Step 2: After you have downloaded and installed MacroRecorder, which is easy and is the same as the installation of other Windows programs, just open the app. After you open the program, you will get the following user interface. Just click on the 'Record' button.
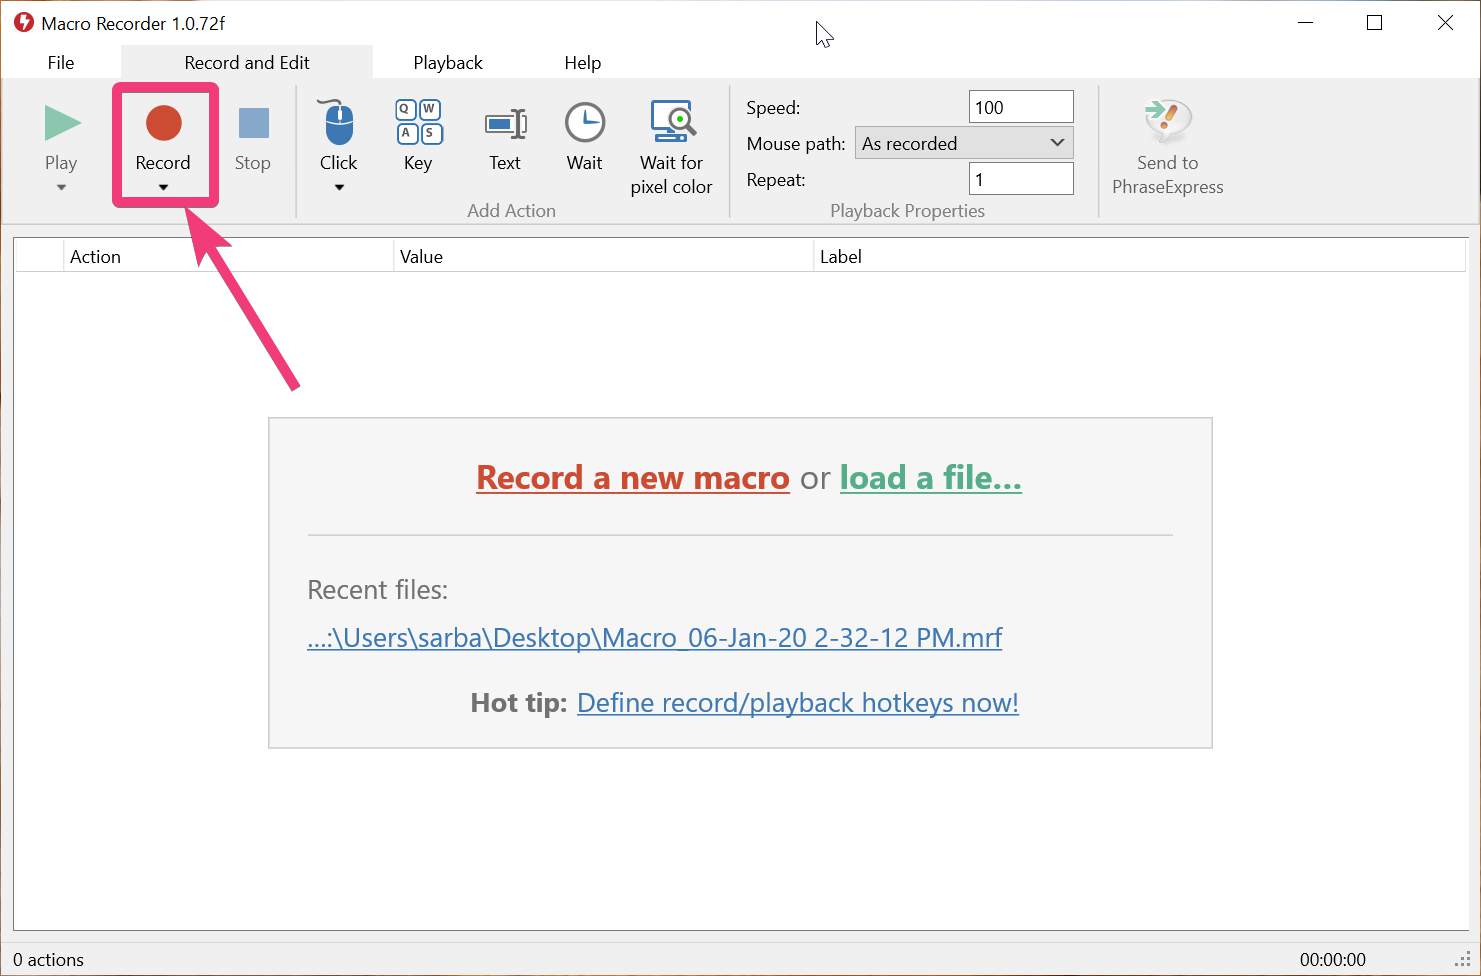
Record a new macro
Step 3: Now, start executing the steps in tandem, and that will automatically be recorded by MacroRecorder. Once all your task is finished, click on the 'Stop' button within MacroRecorder. You can also click on the MacroRecorder icon in the system tray to stop. All the steps executed by you in the middle will also be displayed to you for reference.
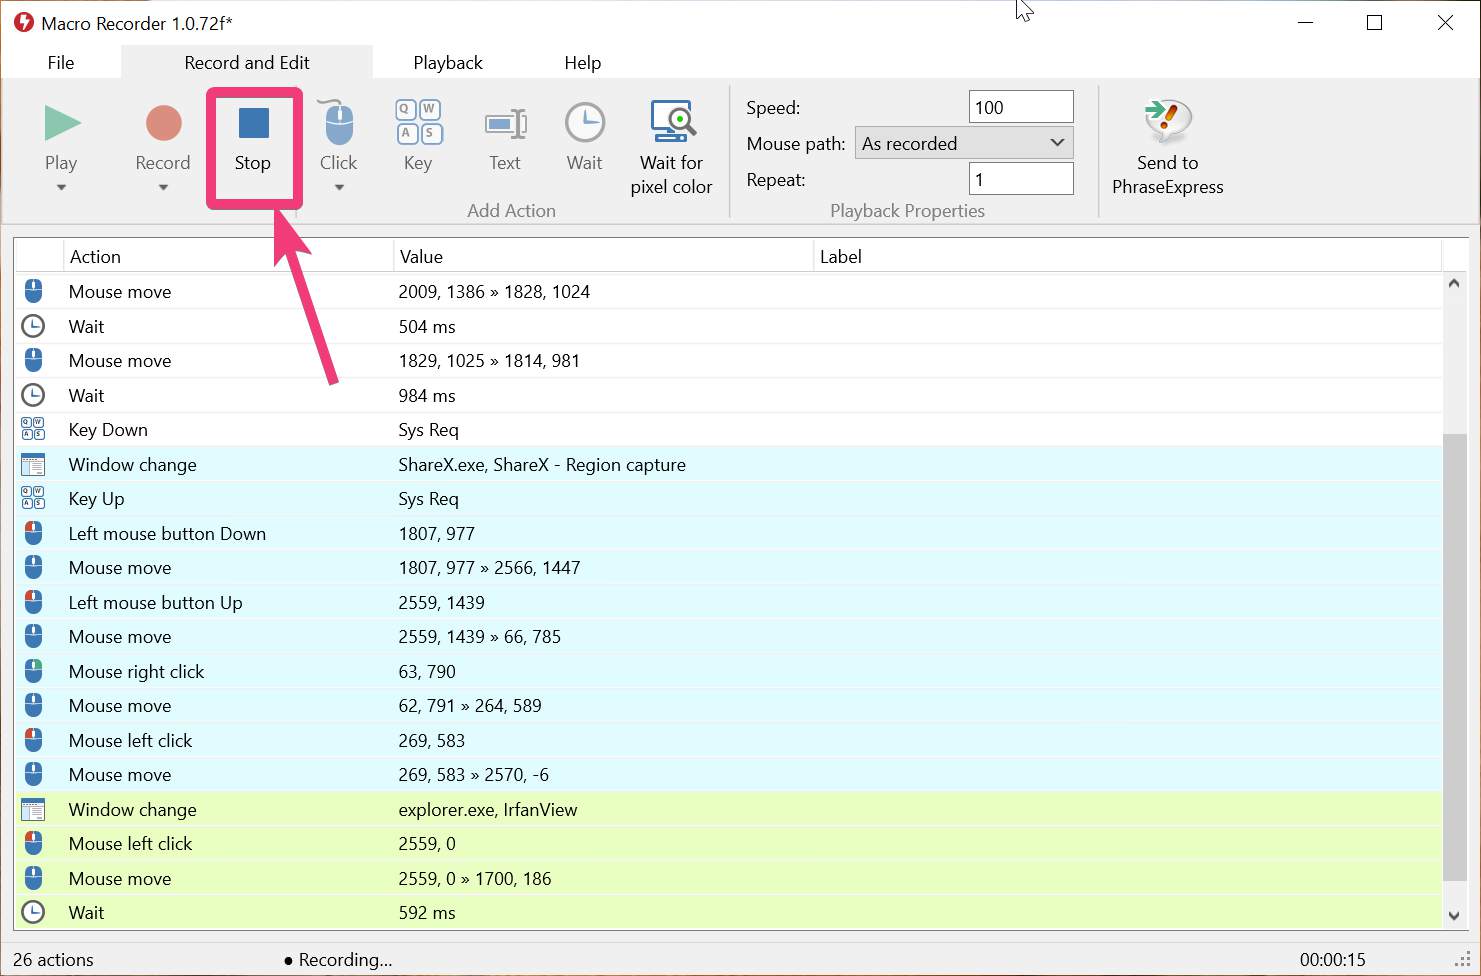
Automatically recorded by MacroRecorder

MacroRecorder icon in the system tray to stop
Step 4: You can even double-click on any of the steps to see the details or make some changes to the activity. It means you can change single-click to double-click or right-click, or vice versa, change the clicking co-ordinates, and so on.
You can also change the waiting time, which means, you can reduce the time between two consecutive activities while running the macro.
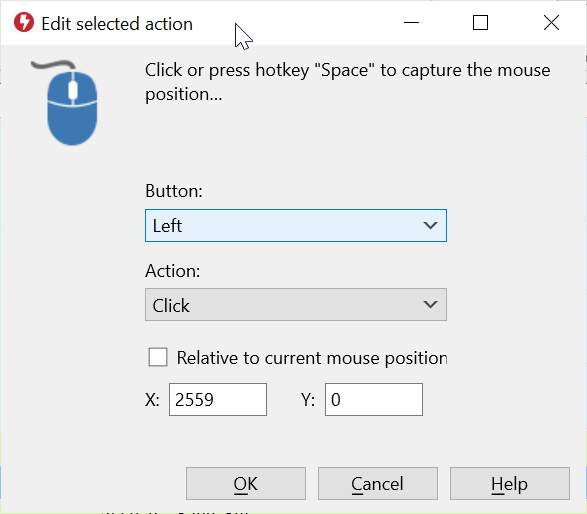
Edit mouse buttons action for Macro recording
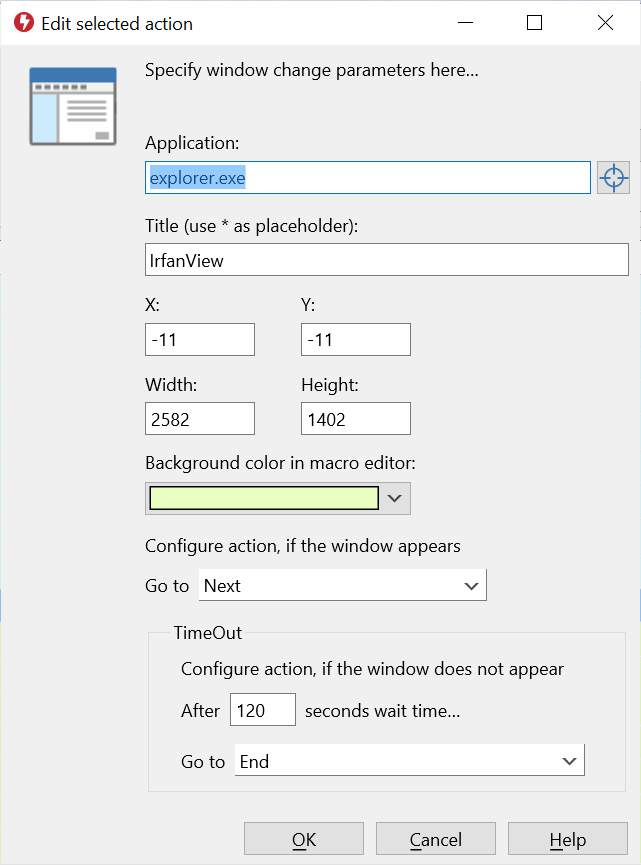
Specify WIndows change parameters here…
Step 5: Finally, you can click on the 'Play' button to check, whether the steps are getting executed properly or not.
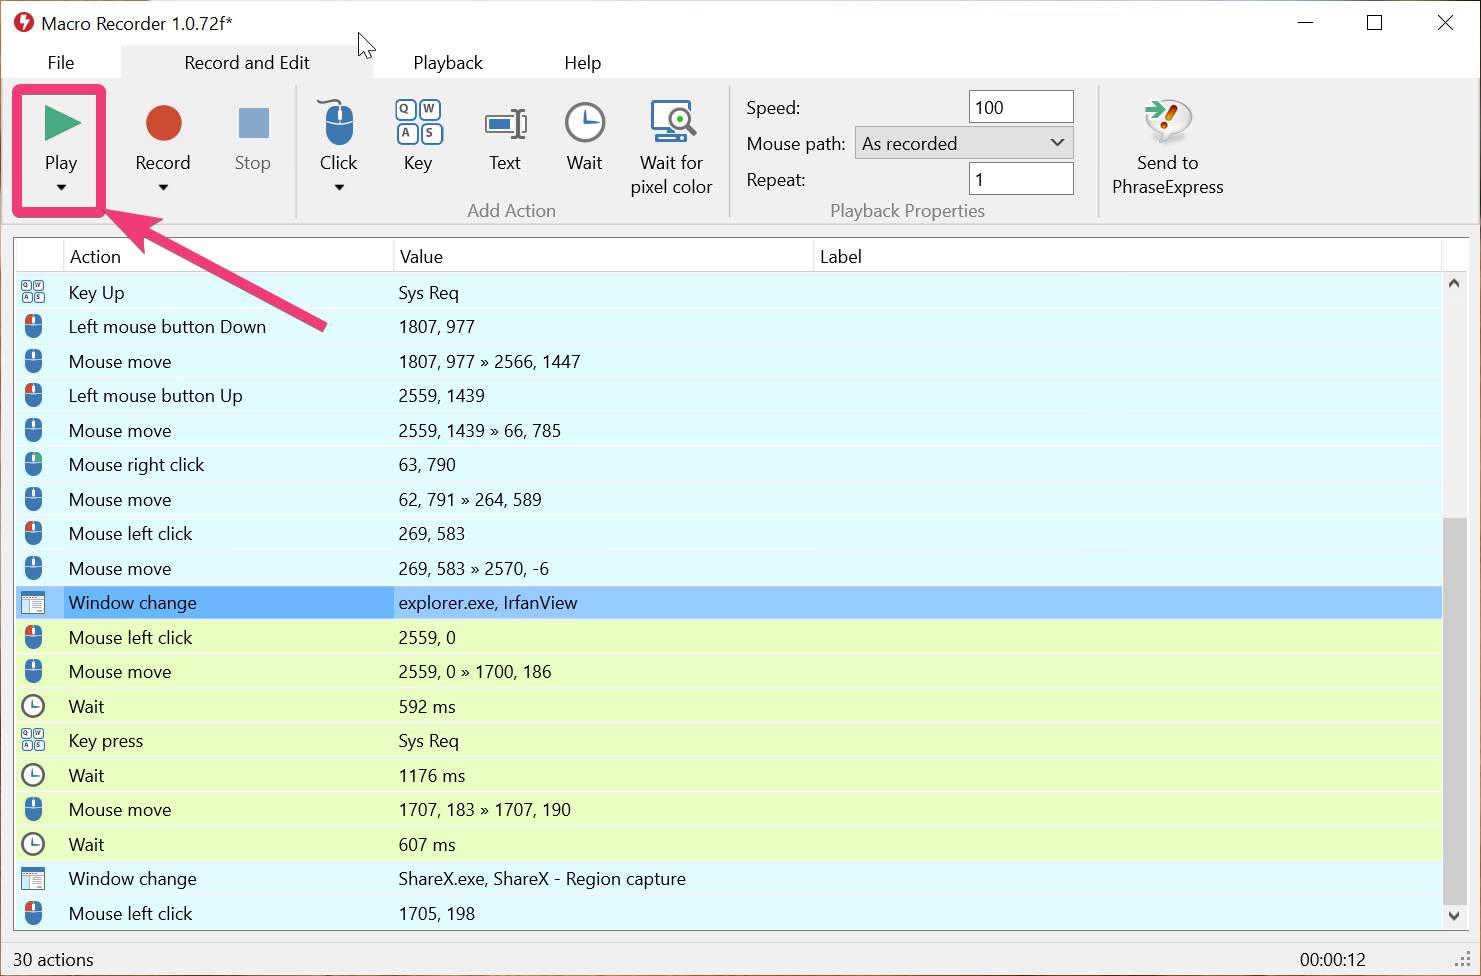
Play button to check recorded macros
Step 6: Once done, it is time to save the macro so that you can run it at any point in time when you need it. Just click on the 'File' tab, and then click on 'Save' .
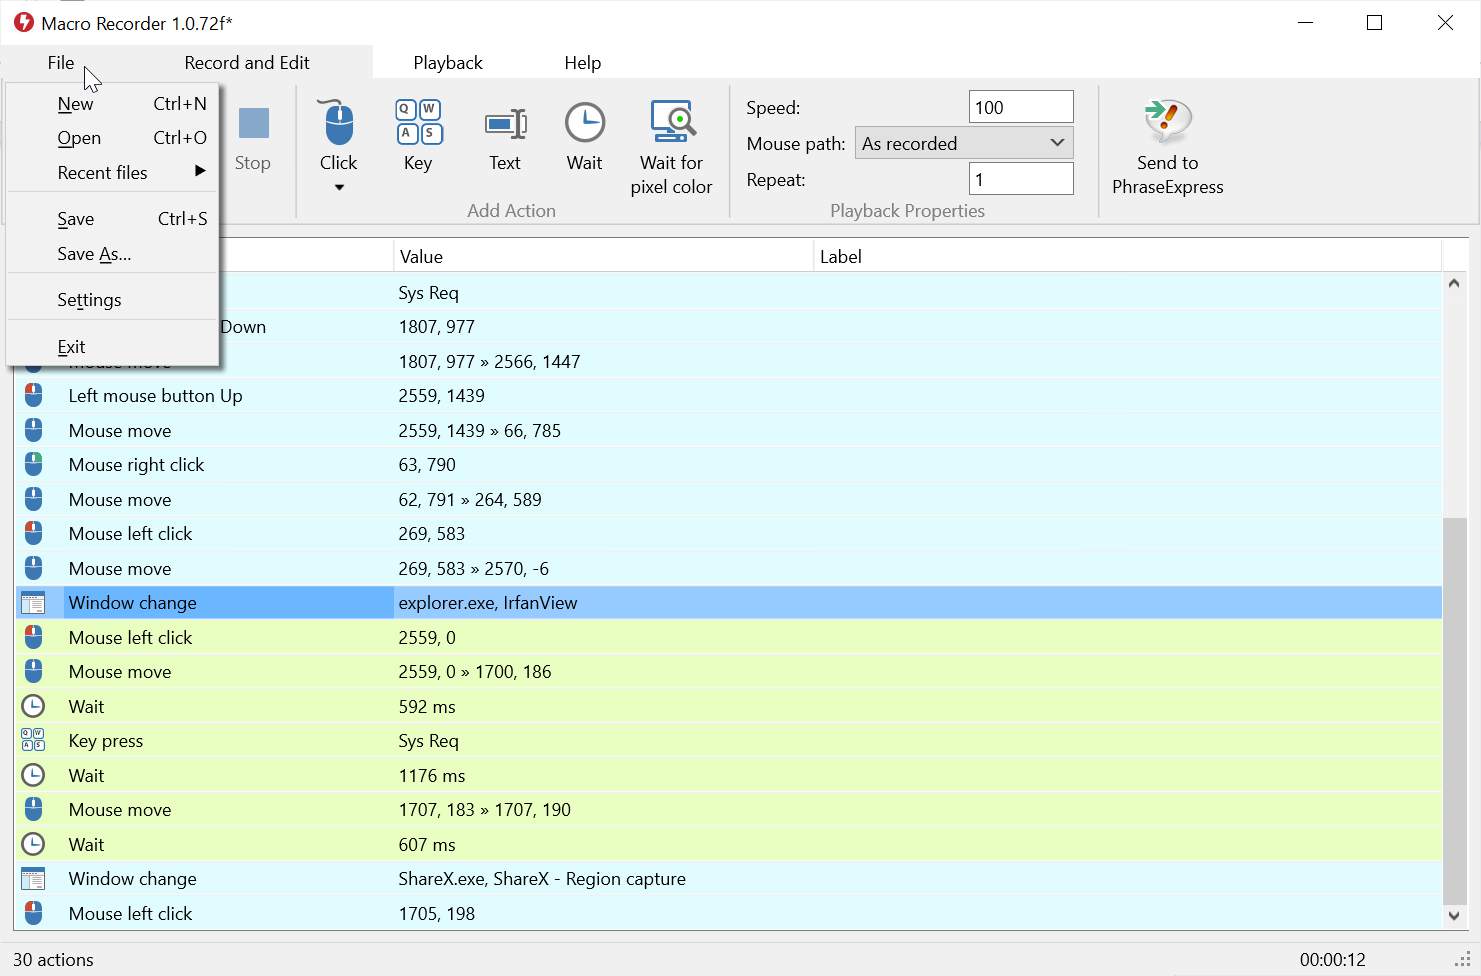
Save the macro on Windows
Step 7: Just select the location to save the macro, and assign a name that can help you to recognize the file when you need it. The macro will be saved with the extension ' .mrf '.
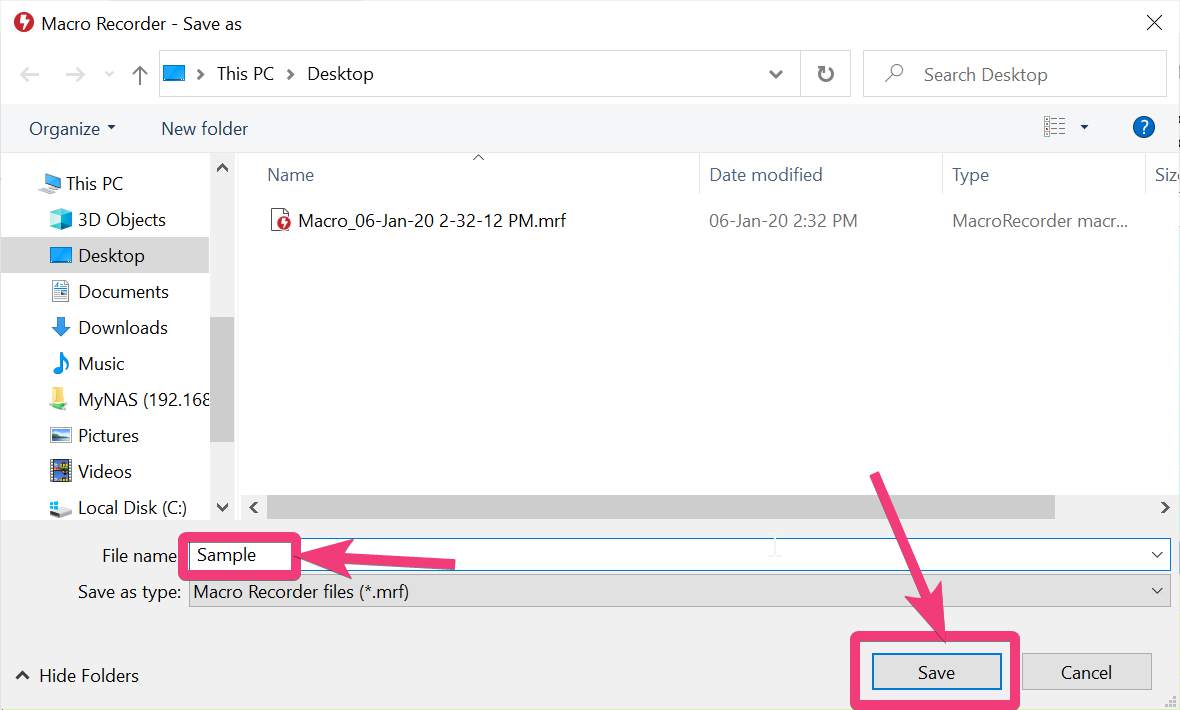
select the location to save the macro
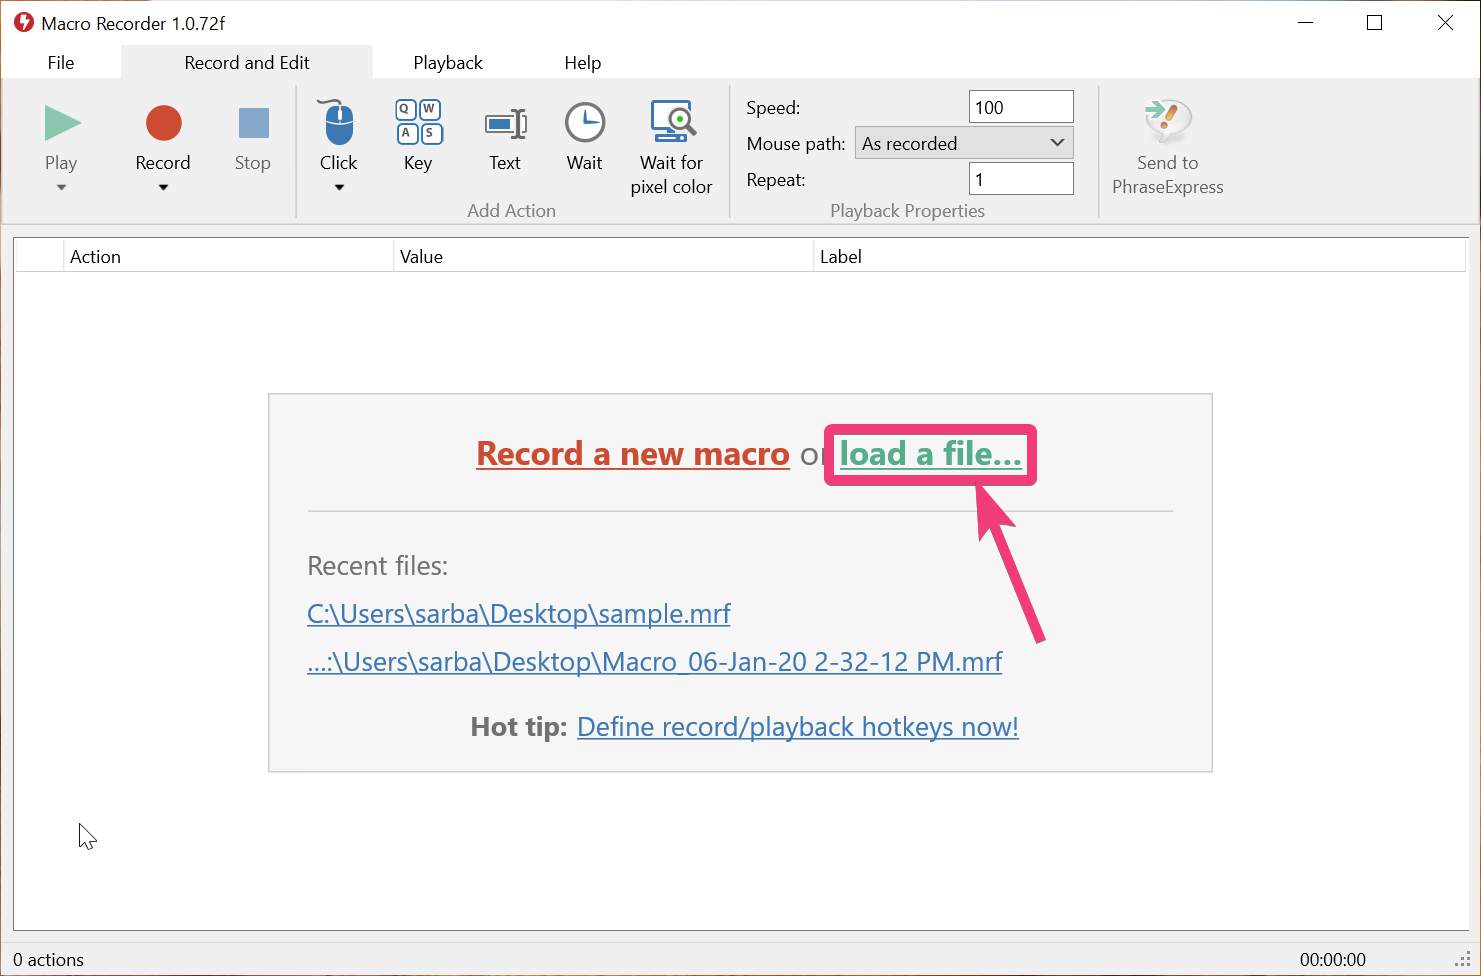
Step 8: Later on, you can simply double-click on the macro file to execute it, or click on ' load a file… ' on the MacroRecorder home screen.
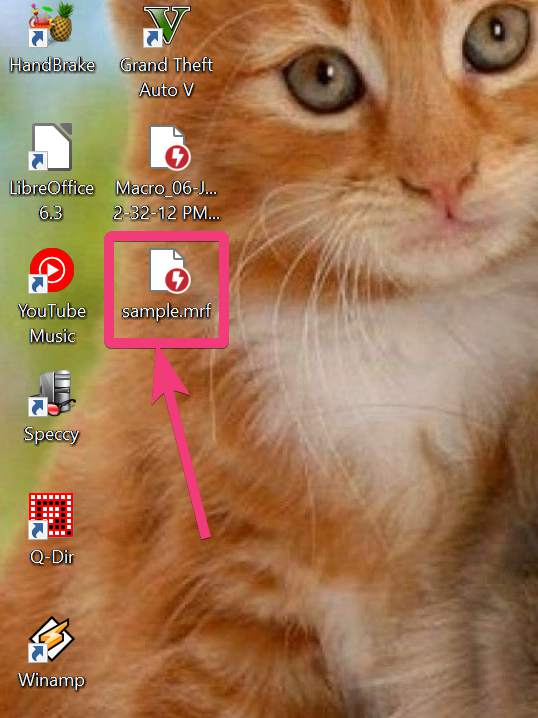
MacroRecorder home screen
MacroRecorder is a smart macro recording application
MacroRecorder is a smart macro recording application as it will only click, double-click or right-click if the clicking co-ordinates are the same, as it was, at the time of recording. This ensures something wrong doesn't happen at the time of running the macro, or it doesn't mess things up.
The premium version of MacroRecorder comes with additional benefits, which include, pixel colour recognition, execution of a step multiple times within a macro, and so on. If you are a power user and want to consume all the benefits of MacroRecorder, go give the premium version a try. However, the free version should be the best option for normal users.
So, that was all about, how you can create macros on a Windows computer, and the things that you should keep in mind at the time of creating macros. Do you have anything to say? Feel free to comment on the same below.
How to Create Keyboard Macros in Windows 10
Source: https://www.how2shout.com/how-to/how-to-create-macros-on-a-windows-10-7-computer.html
0 Response to "How to Create Keyboard Macros in Windows 10"
Post a Comment